DIY Ice Lantern Candles
Looking for a festive and creative way to decorate this season? These DIY ice lantern candles are a simple project that turns everyday items into glowing works of art.
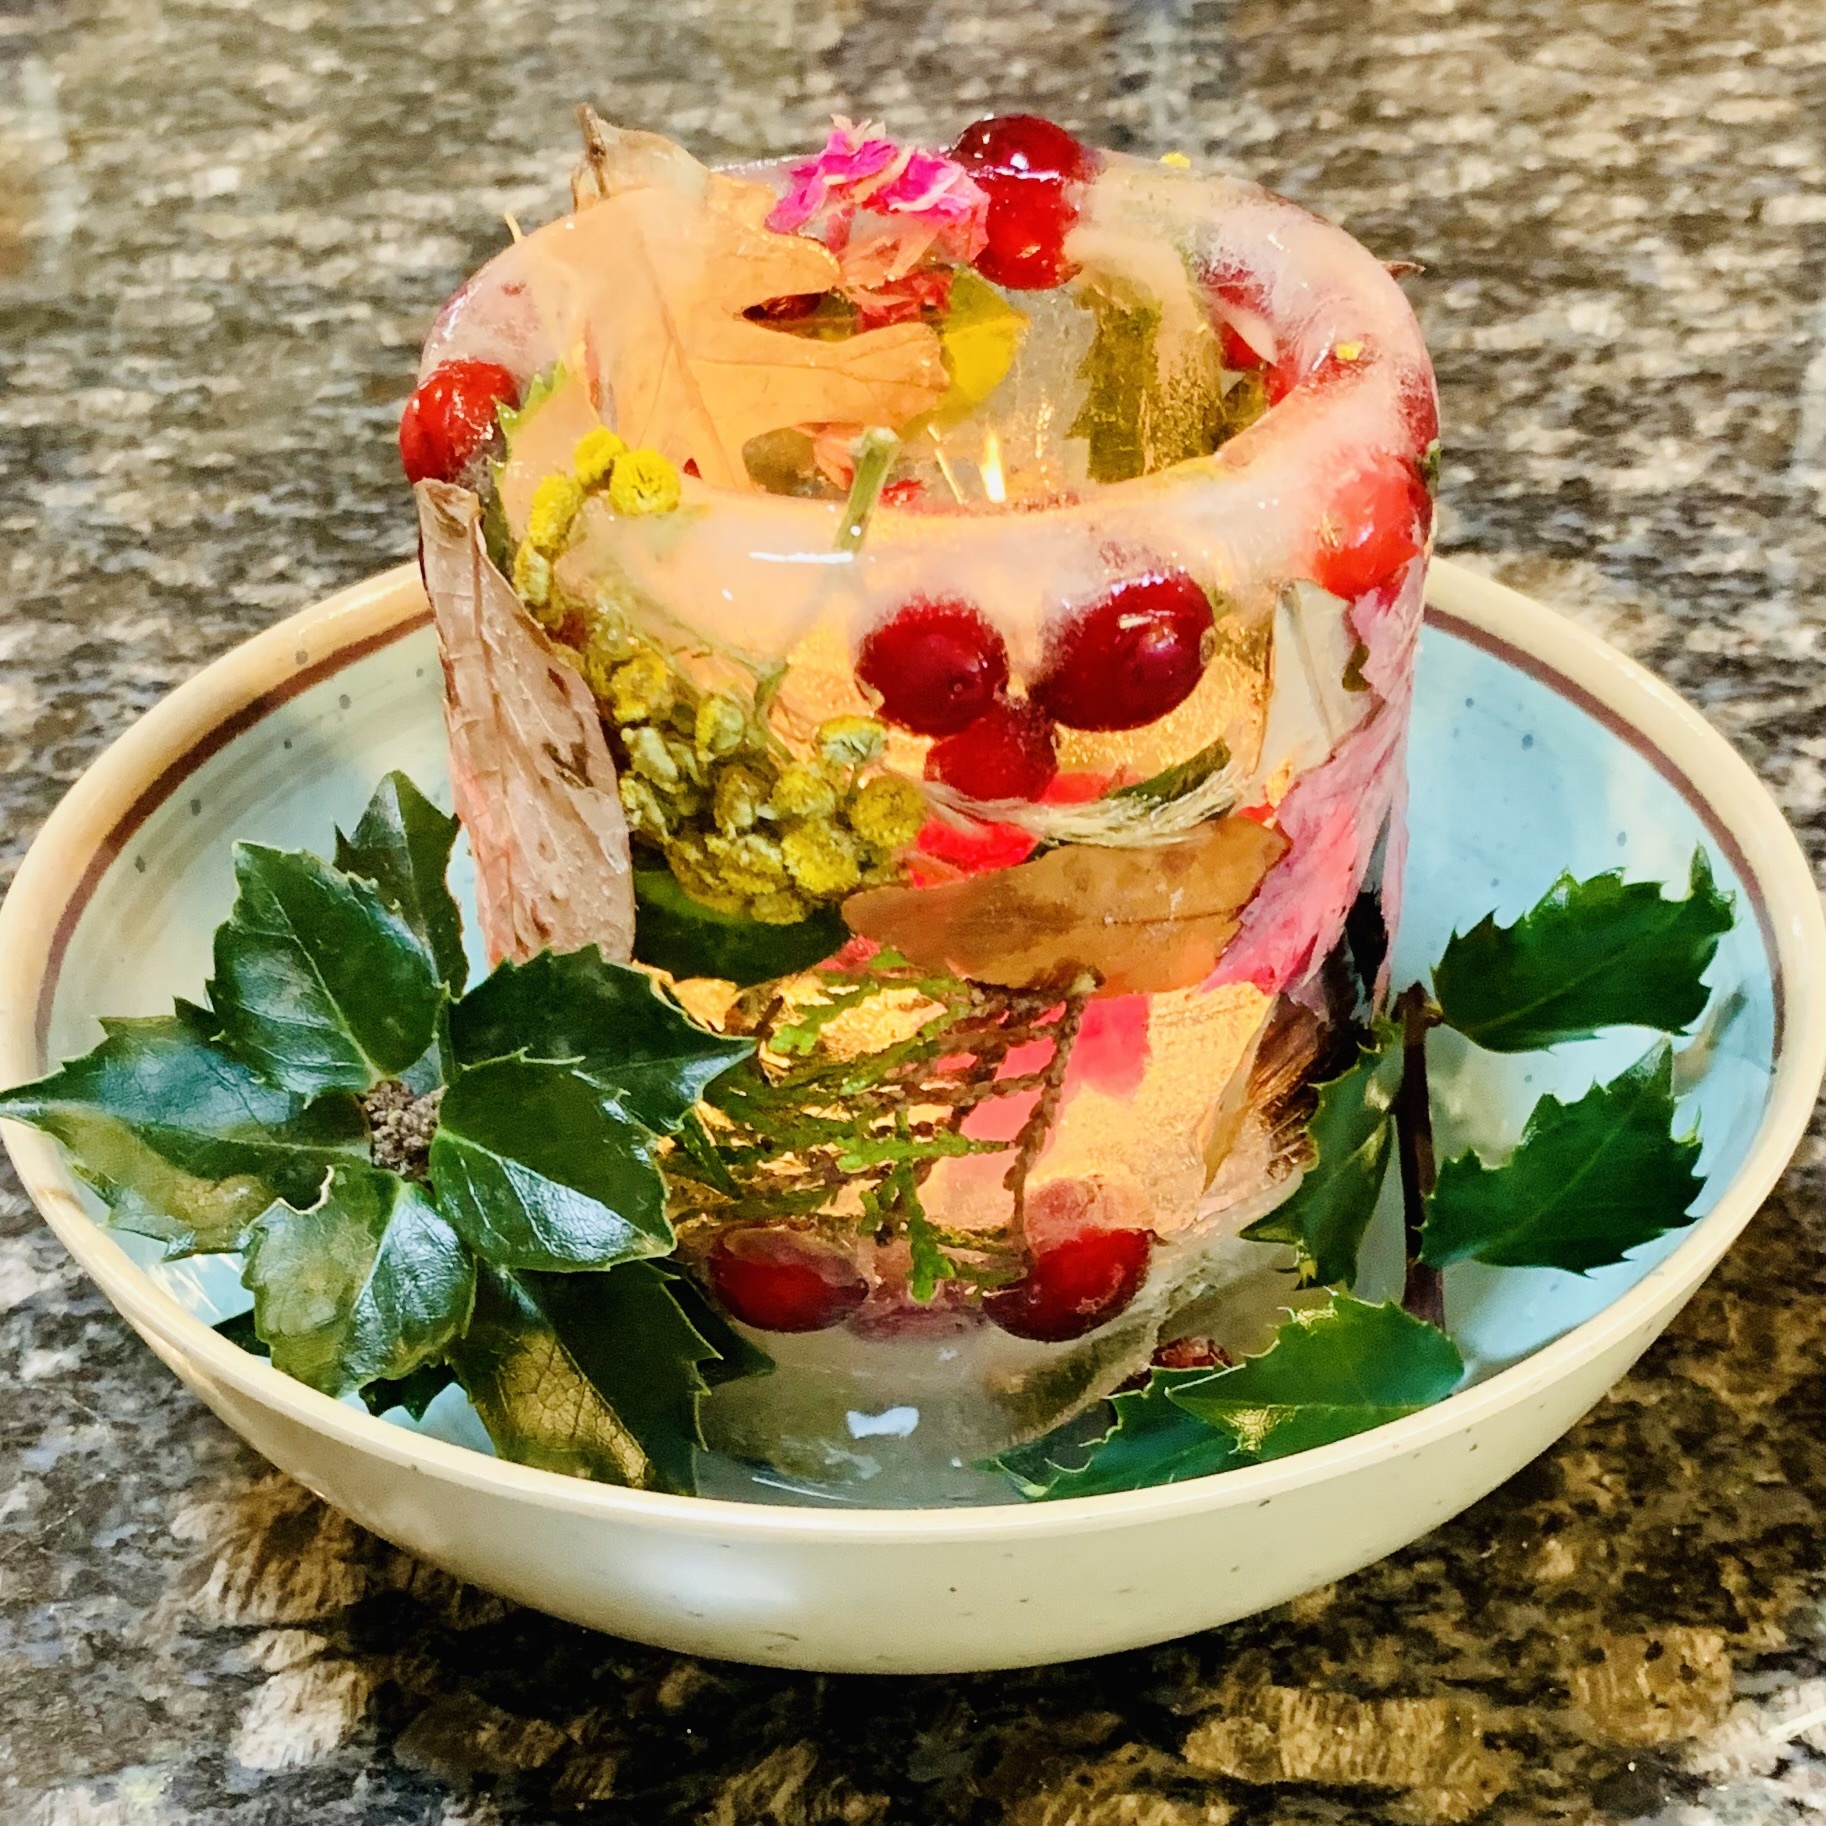
Using natural accents like pine, cranberries, and leaves, you can create beautiful frozen candles that add a touch of magic to any holiday table
Items Needed
- Empty 15 oz cans (soup size)
- Empty 29 oz cans (large)
- LED tealights (or regular tealights)
- Decorations: cranberries, pine sprigs, fall leaves, dried flowers, holly leaves & berries
- Food coloring (optional)
- Rocks – 4–6 stones per candle (about 2–3” each)
Directions
- Prepare the cans
- Rinse and save several 15-oz and 29-oz tin cans.
- Add weights
- Place 4–6 small rocks inside each 15-oz can (adjust the number as needed to achieve balance).
- Assemble the mold
- Set the weighted 15-oz can inside a 29-oz can.
- Fill the outer can with water (leave ½” at the top for ice expansion).
- Be careful not to get water inside the small can.
- Adjust height
- Add or remove rocks so the tops of the cans are level.
- Decorate
- Place pine sprigs, cranberries, holly leaves, berries, fall leaves, or dried flowers in the water around the inner can.
- Optional: add food coloring to tint the ice.
- Freeze
- Make sure there’s ¼–½” of space at the top for ice expansion.
- Place the cans in the freezer until they are completely frozen.
- Remove molds
- To release: turn the cans upside down and run warm water over the outer can.
- Gently pull on the inner can until the ice candle slips out.
- Add the light
- Insert an LED tealight inside the frozen lantern.
- (Regular tealights work but will melt the candle faster.)
- Display
- Place the candle in a bowl or tray to catch the melting water.
- Add holly or greenery around the base for decoration.
Candle Life: About 2 hours